This section describes how to use the wizard to create or modify an export in the CIMCO NFS Server.
The welcome page is displayed when the CIMCO NFS Server is not configured.
Takes you to the next step in the configuration.
Returns to the main window without saving any changes.
Opens the help file.
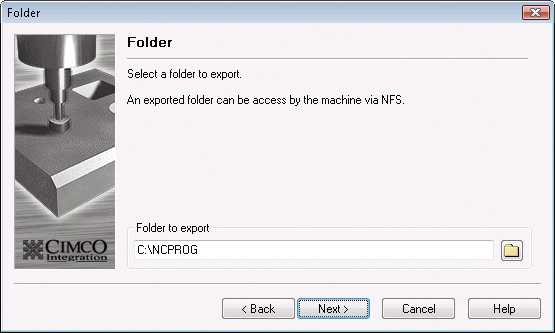
Here, you can select the folder to be exported. You either write the name of the folder, or you can click on the ![]() button to select it from a normal tree selection window.
button to select it from a normal tree selection window.
 |
|
Select export folder |
If the folder you wish to export is on another computer (such as a file server), and the NFS Server is running on a Windows 95/98 computer, then you must first map the folder to a drive (e.g. X:).
If the NFS Server is running on a Windows NT/2000/XP/Server/Vista/7 computer, you may either specify the mapped network drive (e.g. X:) or the UNC path (e.g. \\filserver\ncprogs). In case of a mapped drive, the configuration program converts the mapped drive to a UNC path.
If you use network drives on NT, the configuration program prompts for an account and password if the NFS Server is set to auto start. This enables the NFS Server to run with the specified account without a user having to log on to the NT computer. Make sure the account has the necessary privileges to access the shared network drives.
See the section Novell Netware if you plan to export folders from a Novell Netware server.
Takes you back to the previous step (Welcome Page).
Takes you to the next step in the configuration.
Returns to the main window without saving any changes.
Opens the help file.
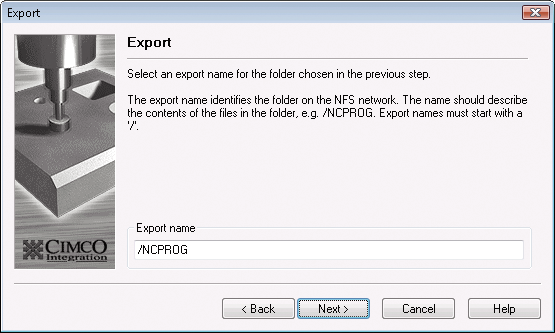
Here you must select an export name. The export name should be descriptive (e.g. /NCPROG), and it should also be unique in the system (you cannot have two configurations with the same export name).
 |
|
Select export name. |
The export names must begin with a "/" character.
Takes you back to the previous step (Select Export Folder).
Takes you to the next step in the configuration.
Returns to the main window without saving any changes.
Opens the help file.
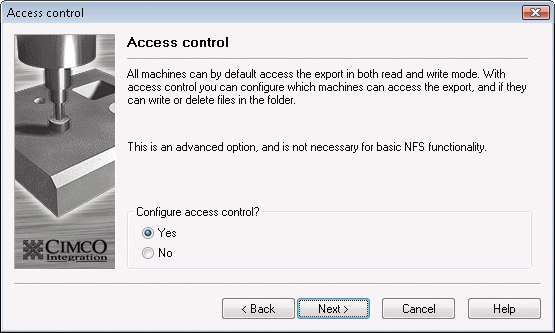
Here, you select whether you wish to use access control or not. See the section Access Control to learn more about access control.
 |
|
Use access control. |
Takes you back to the previous step (Select Export Name).
Takes you to the next step in the configuration.
Returns to the main window without saving any changes.
Opens the help file.
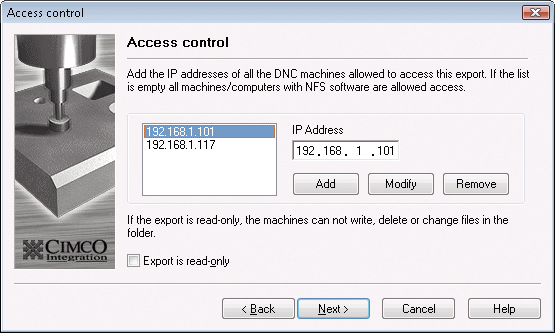
In the field IP Address you can write or edit an IP address.
 |
|
Configuring access control. |
Adds the IP address written in the IP Address field to the list of allowed addresses (to the left).
Changes the selected address in the list of allowed addresses (to the left) to the address written in the IP Address field.
Removes the selected address from the list of allowed addresses (to the left).
If you tick the Export is read-only checkbox, then the CNC machines will only be able to read files from the computer, they will be unable to write, delete or change files in the folder. See the section Access Control to learn more about access control.
Takes you back to the previous step (Use Access Control).
Takes you to the next step in the configuration.
Returns to the main window without saving any changes.
Opens the help file.
Takes you back to the previous step (Use Access Control, or Configuring Access Control if that is active).
Finishes the configuration, saving all changes and returning to the main window.
Returns to the main window without saving any changes.
Opens the help file.
 |
|
Done. |