|
The windows can be synchronized with the wait codes and editing can be done in all windows. Wait codes that match are shown in yellow and missing wait codes are shown in purple. |
The Multi Channel option enables you to view NC programs for 2 or 3 channel machines correctly in the editor, at the same time. The NC codes for each channel are automatically displayed in their own window when the corresponding Wait code is specified.
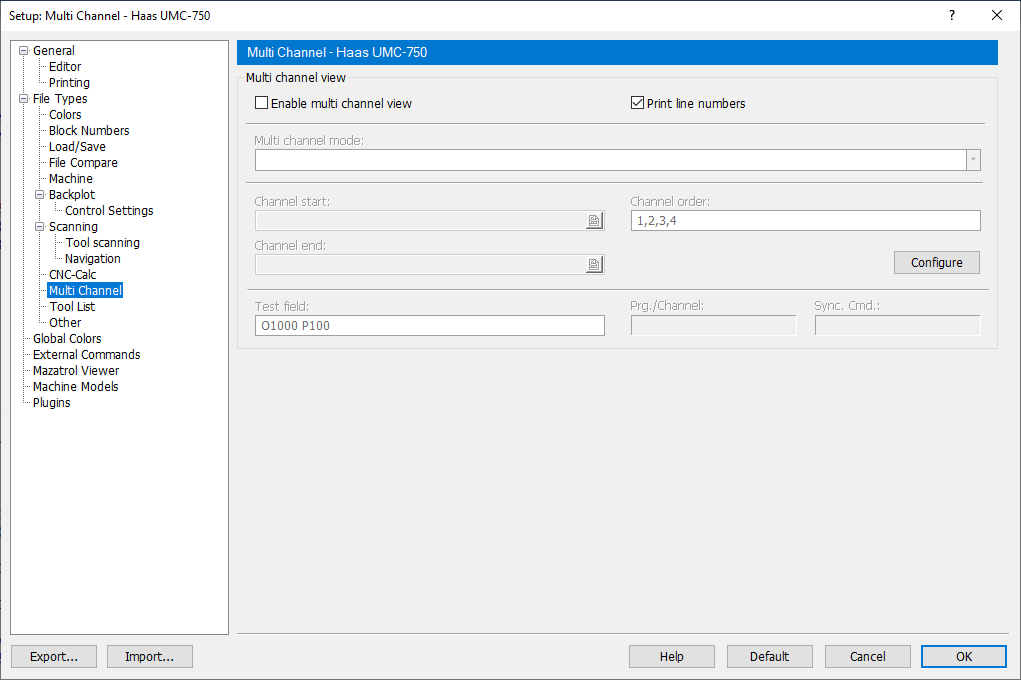
To configure Multi Channel settings, select Multi Channel from the File types menu in the left window of the Editor Setup dialog, or click the Setup Multi Channel icon in the Multi Channel menu within the NC-Assistant tab. The Multi Channel configuration dialog is shown below.
|
The windows can be synchronized with the wait codes and editing can be done in all windows. Wait codes that match are shown in yellow and missing wait codes are shown in purple. |
 |
|
Multi Channel configuration dialog. |
Check this field to enable the multi channel view.
Check this field to include line numbers in the print output.
Use this drop-down list to specify how to read the multi channel information. You can either select one of the predefined types, or the custom type to manually define the multi channel commands.
Use this field to specify the start of a channel information, when multiple channels are stored in the same file.
Example: Specify O if each channel starts with an O number. You can specify multiple strings separated by comma. For example, if the first channel starts with G13 and the second channel starts with G14, then specify G13,G14 in this field. You can also specify the start of channel information using an advanced trigger.
Use this field to specify the end of a channel information, when multiple channels are stored in the same file.
Example: Specify M30 if each channel ends with M30. You can also specify the end of channel information using an advanced trigger.
Use this field to specify the channel order, for example 1,3,2.
Select this button to open the channel configuration. Configure synchronisation commands to a set of defined channels.
Use this field to test the multi channel setup.